
Pergola Installation Cost & Timeline: Complete Project Planning Guide 2026
Published November 6, 2026 · By AluShed Team · 11 min read
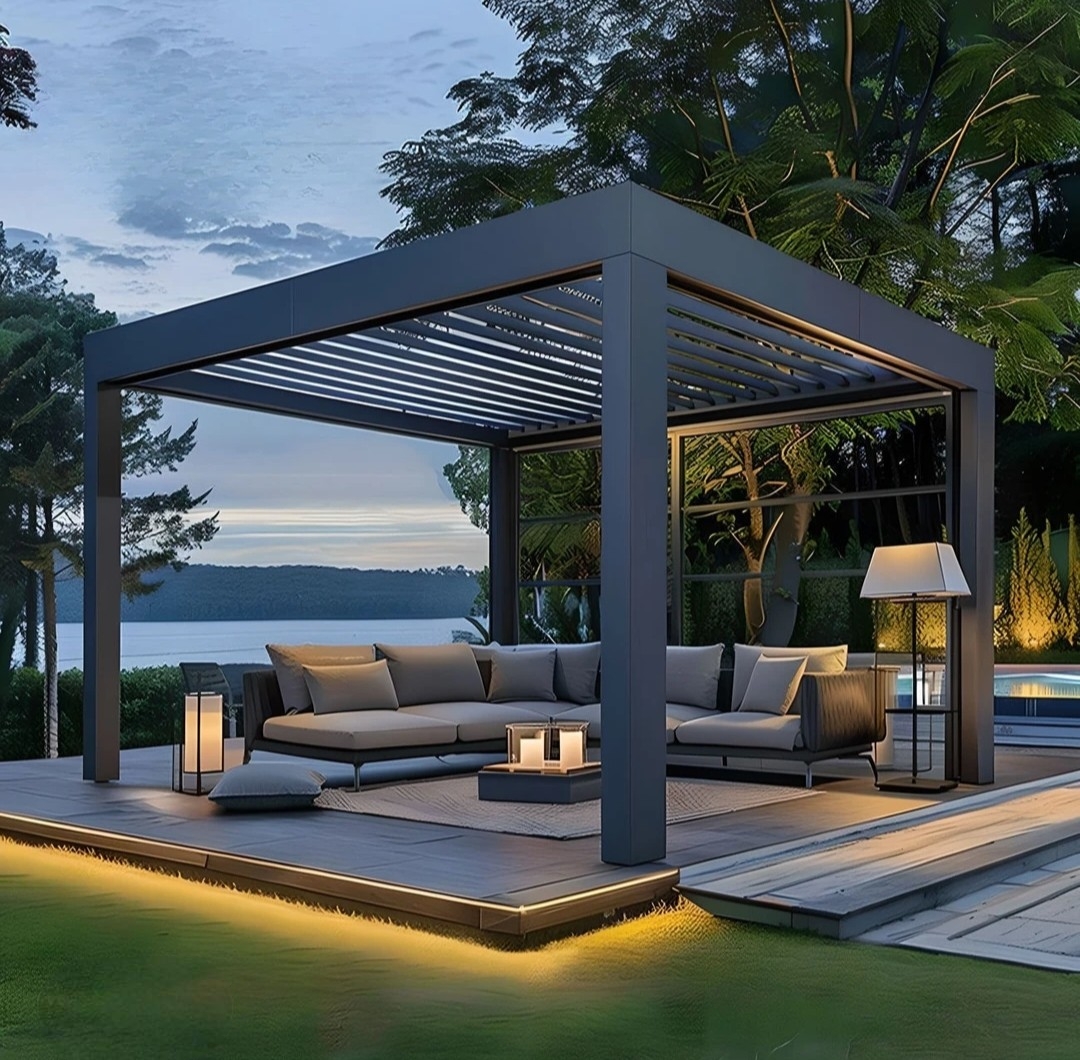
A standard 4×3m motorized louvered pergola costs $500–$1,200 to install professionally (1–2 days), or $0 if DIY (2–3 people, 2 days). Add $300–$800 for concrete foundations if needed, $150–$400 for electrical, and $50–$500 for permits. The full project from order to enjoying your pergola takes 4–8 weeks (1–2 weeks manufacturing + 2–4 weeks shipping + 1 week installation). This is Part 6 — the final article — of our bioclimatic pergola series.
You've chosen the right size, picked the best material, decided on ZIP screens, and planned your smart automation. Now the final question: how much does installation cost, and how long until I can use it?
This guide covers every cost and timeline detail: foundations, labor, electrical, permits, shipping, DIY vs pro, step-by-step installation, and a complete project planning checklist. By the end, you'll know exactly what to budget and when to schedule.
📑 Table of Contents
- Total Installation Cost Breakdown
- Foundation Options & Costs
- Labor Costs by Country & Region
- Electrical & Smart Setup Costs
- Permits & Building Regulations
- Shipping & Lead Times
- DIY vs Professional Installation
- Step-by-Step Installation Process
- Complete Project Timeline (Order to Completion)
- Project Planning Checklist
- Frequently Asked Questions
1. Total Installation Cost Breakdown
Here's the full cost picture for a standard 4×3m motorized louvered pergola:
| Cost Item | Budget | Typical ⭐ | Premium | Notes |
|---|---|---|---|---|
| Pergola unit (4×3m) | $2,000 | $3,000 | $5,000 | Factory-direct vs dealer vs branded |
| Foundation (if needed) | $200 | $500 | $1,000 | Concrete footings or new slab |
| Labor (professional) | $500 | $900 | $2,000 | 1–2 days, 2–3 people |
| Electrical | $100 | $250 | $500 | Outlet + conduit for motor |
| Permits | $0 | $150 | $500 | Depends on location/size |
| ZIP screens (3-side) | $3,000 | $5,500 | $10,000 | Optional, adds 1 day labor |
| Smart automation | $200 | $500 | $1,200 | WiFi motor + sensors |
| Total (pergola only) | $2,800 | $4,800 | $8,700 | Excluding ZIP screens |
| Total (full package) | $6,000 | $10,800 | $19,900 | With 3-side ZIP screens + smart |
2. Foundation Options & Costs
The foundation is critical — it supports the entire structure and ensures stability in wind. Here are your options:
Option 1: Existing Concrete Slab (Best, Cheapest)
- Requirements: Minimum 10cm (4") thick reinforced concrete, in good condition (no cracks > 3mm)
- Installation: Drill holes with a hammer drill, use chemical anchor bolts or expansion bolts
- Cost: $0–$100 (just the anchor bolts)
- Time: 30 minutes per post
- Best for: Most patios already have a concrete slab — this is the ideal scenario
Option 2: Concrete Footings (Most Common)
- Requirements: Dig 30×30×40cm (12×12×16") holes per post (4 posts = 4 holes)
- Installation: Pour concrete, embed post base anchors, let cure 3–7 days
- Cost: $200–$500 (concrete + anchors + labor)
- Time: 1 day to dig + pour, 3–7 days curing
- Best for: Grass, dirt, gravel, or paver surfaces
Option 3: New Concrete Slab (Premium)
- Requirements: Pour a new 10–15cm reinforced concrete slab covering the full pergola area
- Cost: $500–$1,500 (depending on size and local concrete prices)
- Time: 1–2 days to pour, 7 days curing
- Best for: New patio construction, or if you want a finished floor under the pergola
Option 4: Ground Spikes / Helical Piles (No Concrete)
- Requirements: Screw metal helical piles into the ground (no digging, no concrete)
- Cost: $150–$400
- Time: 2–4 hours (no curing wait — install pergola same day)
- Best for: Temporary installations, rental properties, areas with high water tables, or where concrete is prohibited
- Limitation: Not recommended for areas with very high wind (above 120 km/h) or very soft soil
3. Labor Costs by Country & Region
Labor costs vary dramatically by location. Here's a comparison for a standard 4×3m installation (1–2 days):
| Country / Region | Daily Rate (per person) | Total Labor (2 people, 2 days) |
|---|---|---|
| 🇲🇾 Malaysia | $40–$80 | $160–$320 |
| 🇹🇭 Thailand | $30–$60 | $120–$240 |
| 🇮🇩 Indonesia | $25–$50 | $100–$200 |
| 🇻🇳 Vietnam | $25–$55 | $100–$220 |
| 🇦🇪 UAE / Dubai | $80–$150 | $320–$600 |
| 🇦🇺 Australia | $200–$350 | $800–$1,400 |
| 🇬🇧 UK | £150–£250 | £600–£1,000 ($750–$1,250) |
| 🇺🇸 USA | $200–$400 | $800–$1,600 |
| 🇪🇺 Europe (avg) | €150–€300 | €600–€1,200 ($650–$1,300) |
4. Electrical & Smart Setup Costs
Motorized pergolas need power. Here's what's involved:
Basic Electrical (Standard Motor)
- Requirements: A weatherproof outdoor power outlet (IP44 or higher) within 3m of the motor location
- Cost: $100–$300 (electrician, 1–2 hours)
- Best practice: Install the outlet inside a post or under the beam for a clean look
- Voltage: 230V (most countries) or 110V (USA/Canada) — specify when ordering
Conduit Installation (Clean Look)
- Requirements: Run PVC or metal conduit from the power source to the motor, hidden in the post or under the patio
- Cost: $150–$400 (materials + labor)
- Best time: Before pouring concrete foundations — embed the conduit in the slab
- Benefit: No visible wires, professional finish, protected from weather
Smart Setup (WiFi + Sensors)
- WiFi motor: No extra electrical work — connects to your existing WiFi
- Wired sensors: Low-voltage (12–24V) cable from sensor to motor controller. Can run alongside the power conduit.
- Wireless sensors: No wiring needed — battery-powered, connect via WiFi/Zigbee
- Cost: $0–$200 extra for wired sensor cabling (wireless = $0)
- Setup time: 30–60 minutes for app configuration and automation rules
5. Permits & Building Regulations
When You Need a Permit
- Usually NOT required: Freestanding pergolas under 20m² (215 sq ft), under 2.5m (8'2") eave height, not attached to the house
- Usually required: Wall-attached pergolas, structures over 20m², over 2.5m height, in historic districts, or in HOA-governed communities
- Always check: Local building department (city/county), HOA rules, and any easement/setback requirements
Permit Costs & Timeline
| Location | Permit Cost | Processing Time | What's Needed |
|---|---|---|---|
| Malaysia | RM100–500 ($25–120) | 1–2 weeks | Site plan, product specs |
| Australia | AUD$200–800 | 2–4 weeks | Engineer cert, site plan, BAL rating |
| UK | £0–300 (planning) | 3–8 weeks | Planning permission (if needed), building regs |
| USA | $50–500 | 1–4 weeks | Site plan, structural calcs, HOA approval |
| UAE/Dubai | AED500–2,000 | 2–6 weeks | Municipality approval, engineer drawings |
6. Shipping & Lead Times
| Phase | Standard | Custom Size | Notes |
|---|---|---|---|
| Manufacturing | 7–10 days | 10–15 days | From deposit payment to ready-to-ship |
| Sea freight (Asia) | 7–14 days | 7–14 days | Foshan → Malaysia/Singapore/Thailand |
| Sea freight (Middle East) | 14–21 days | 14–21 days | Foshan → Dubai/Jeddah |
| Sea freight (Europe/America) | 25–35 days | 25–35 days | Foshan → Rotterdam/Los Angeles |
| Air freight (express) | 5–7 days | 5–7 days | 3–5x more expensive than sea |
| Customs clearance | 3–7 days | 3–7 days | Depends on country and customs efficiency |
| Total (order → delivery) | 3–6 weeks | 4–8 weeks | Manufacturing + shipping + customs |
7. DIY vs Professional Installation
| Factor | DIY | Professional |
|---|---|---|
| Cost | $0 labor (tools + materials) | $500–$2,000 |
| Time | 2–3 days (2–3 people) | 1–2 days (experienced crew) |
| Tools needed | Drill, level, wrench, ladder, hammer drill | All tools provided |
| Difficulty | Moderate (IKEA-plus level) | N/A |
| Warranty | Product warranty only | Product + labor warranty |
| Electrical | ⚠️ Hire electrician (code requirement) | Included or arranged |
| Best for | Handy homeowners, budget, small sizes | Large/complex, permits, time-sensitive |
8. Step-by-Step Installation Process
Day 1: Foundation & Frame
- Site prep (30 min): Clear the area, verify dimensions, mark post positions with chalk or spray paint
- Foundation (2–4 hrs): Drill anchor holes (concrete slab) or dig footing holes (dirt/grass). Install post base plates.
- Post installation (1 hr): Mount posts to base plates, check plumb with a level on both axes
- Beam assembly (1–2 hrs): Attach main horizontal beams to posts. This is the 2-person job — beams are long and heavy.
- Cross beams (1 hr): Install intermediate cross beams (if required for larger spans)
- Level check (30 min): Verify the entire frame is square and level. Adjust footings if needed.
Day 2: Louvers, Motor & Finishing
- Louver installation (2–3 hrs): Insert each louver blade into the rotation mechanism. Start from one end and work across. Each blade clicks into place.
- Motor installation (1 hr): Insert the tubular motor into the roller tube, connect to the drive shaft, wire to power
- Motor programming (30 min): Set the fully-open (90°) and fully-closed (0°) limits. Test rotation in both directions.
- Drainage system (30 min): Connect downspouts from the integrated gutters to your drainage system. Test with a hose.
- ZIP screens (optional, 2–3 hrs): Mount side tracks, install roller cassettes, thread fabric, set limits
- Smart setup (30 min): Connect WiFi motor to app, pair sensors, create automation rules, link to Alexa/Google Home
- Final inspection (30 min): Check all bolts are tight, test full operation cycle, clean up packaging
9. Complete Project Timeline (Order to Completion)
| Week | Task | Who |
|---|---|---|
| Week 0 | Finalize size, color, options. Get quote. Place order with 50% deposit. | You + AluShed |
| Week 1–2 | Manufacturing in Foshan factory. Quality inspection. Request permit drawings if needed. | AluShed |
| Week 2–3 | Apply for permits (if required). Book electrician. Prepare site (clear area, plan foundation). | You |
| Week 3–6 | Sea freight to your port. Customs clearance. Arrange delivery to your home. | Shipping agent |
| Week 6 | Receive delivery. Inspect for shipping damage. Inventory all parts against the packing list. | You |
| Week 7 (Day 1) | Foundation work (if needed). Pour concrete footings. Wait 3–7 days for curing. | You / contractor |
| Week 7–8 (Day 2–3) | Install pergola frame, louvers, motor. Electrical connection. ZIP screens. Smart setup. | You / installer |
| Week 8 | 🎉 Enjoy your pergola! Test all features. Set up automations. First dinner under the stars. | You 🥂 |
10. Project Planning Checklist
Use this checklist to track your project from start to finish:
☑️ Before Ordering
- ☐ Measure your space (width × depth × height clearance)
- ☐ Choose pergola size (see size guide)
- ☐ Choose color and options (motor, ZIP screens, smart package)
- ☐ Check local building codes and permit requirements
- ☐ Check HOA rules (if applicable)
- ☐ Verify existing foundation (concrete slab? condition? thickness?)
- ☐ Check WiFi coverage at the pergola location (for smart models)
- ☐ Identify power source location (nearest outdoor outlet)
- ☐ Get a quote from AluShed (factory-direct = best price)
☑️ During Manufacturing & Shipping
- ☐ Place order with deposit
- ☐ Request permit/engineering drawings (if needed)
- ☐ Submit permit application (if needed)
- ☐ Book electrician for installation week
- ☐ Book installer (if not DIY)
- ☐ Plan foundation work (schedule concrete pour)
- ☐ Arrange shipping insurance (recommended)
- ☐ Track shipment
☐ Installation Week
- ☐ Receive delivery, inspect for damage, inventory parts
- ☐ Prepare site (clear, clean, mark positions)
- ☐ Foundation work (day before, if concrete needed)
- ☐ Gather tools (drill, level, wrench, ladder, hammer drill)
- ☐ Recruit 1–2 helpers (frame assembly is a 2-person job)
- ☐ Install frame (Day 1)
- ☐ Install louvers + motor (Day 2)
- ☐ Electrical connection by licensed electrician
- ☐ Install ZIP screens (if ordered)
- ☐ Smart setup (app, sensors, voice, automations)
- ☐ Final inspection and cleanup
☐ Post-Installation
- ☐ Test full operation (open/close, all angles, screens, lights)
- ☐ Set up smart automations (rain close, wind retract, etc.)
- ☐ Register warranty (take photos of installation)
- ☐ Schedule first maintenance (3 months — check bolt tightness)
- ☐ 🎉 Host your first outdoor dinner!
11. Frequently Asked Questions
How much does it cost to install a motorized louvered pergola?
Total installation cost ranges from $500 to $3,000 depending on size, location, and complexity. A standard 4×3m pergola on a concrete patio costs $500–$1,200 for professional labor (1–2 days). Adding foundations (if no existing slab) costs $300–$800. Electrical work for motorized units costs $150–$400. DIY installation can reduce labor to $0 but requires 2–3 people and basic tools. Factory-direct pergolas from AluShed include detailed installation manuals and video support, making DIY feasible for most homeowners.
How long does it take to install a pergola?
A standard 4×3m motorized louvered pergola takes 1–2 days for professional installation (2–3 people). Day 1: foundation preparation, post installation, frame assembly. Day 2: louver installation, motor wiring, testing, and cleanup. Larger sizes (6×4m+) or multi-bay systems take 2–4 days. If concrete foundations are needed, add 3–7 days for curing before the pergola can be installed. The full project from order to completion typically takes 4–8 weeks including manufacturing (1–2 weeks) and shipping (2–4 weeks).
Do I need a permit to install a pergola?
It depends on your location and the pergola size. In many areas, freestanding pergolas under 20m² (215 sq ft) and under 2.5m height don't require a permit. Larger structures, wall-attached pergolas, or those in historic districts/HOA communities usually do. Always check with your local building department and HOA before ordering. Permit costs range from $50–$500 and take 1–4 weeks to process. AluShed can provide engineering drawings and structural calculations to support your permit application — free of charge for our customers.
Can I install a pergola on an existing concrete patio?
Yes, this is the ideal scenario. If your concrete slab is at least 10cm (4") thick, reinforced, and in good condition (no large cracks), you can bolt the pergola posts directly to the slab using chemical anchor bolts or expansion bolts. This costs $0–$100 for the anchors and takes 30 minutes per post. Always check the slab condition first — if it's cracked, crumbling, or too thin, you'll need to pour new footings instead.
How many people are needed to install a pergola?
A standard 4×3m pergola requires 2–3 people for installation. The main beam assembly is the heaviest step — a 4m beam weighs 20–30kg and needs to be lifted to 2.5m height, which is a 2-person job. The rest of the installation (posts, louvers, motor) can be done by 1–2 people. For larger sizes (6×4m+), we recommend 3–4 people. Professional crews typically work in teams of 2–3 and complete the job in 1–2 days.
What tools do I need for DIY installation?
Basic tools needed: cordless drill (with hex and Phillips bits), hammer drill (for concrete anchors), spirit level (60cm+), adjustable wrench, tape measure, ladder (2.5m+), socket set, and safety gear (gloves, safety glasses). For concrete footings, you'll also need a shovel, wheelbarrow, and concrete mix. All specialized hardware (bolts, anchors, brackets) is included with the pergola kit.
🔗 Related Articles
Ready to Start Your Pergola Project?
Get a factory-direct quote with complete installation cost breakdown. We'll provide engineering drawings, installation manuals, and video support. OEM/ODM available for distributors. This is the final article in our 6-part bioclimatic pergola series — you're now an expert!
🔗 Complete Bioclimatic Pergola Series (6 Articles)
- Part 1: Bioclimatic Aluminum Pergola — Technology & Materials
- Part 2: Pergola Sizes & Dimensions Guide
- Part 3: Aluminum vs Wood vs Steel — Material Comparison
- Part 4: Pergola + ZIP Screens — Outdoor Room Enclosure
- Part 5: Smart Pergola Automation — WiFi, Voice & Sensors
- → Part 6: Pergola Installation Cost & Timeline (this article)